Automate the iOS App Development and Release Process with Fastlane
17 Dec 2022As an iOS developer, we need to archive our app for App Store submission. It’s a boring and repetitive task. There are many steps to do it. We need to open Xcode, select the right scheme, select the right certificate, select the right provisioning profile, select the right team, select the right device, and then archive it. It’s a lot of steps. To make it easier, we absolute can write a shell script instead of the IDE operation. But it contains many commands and arguments. It’s not easy to write and maintain. So I choose to use Fastlane to do it. It’s a tool to automate building, testing and releasing iOS and Android apps. The rest of this article will show you how to use Fastlane to facilitate the iOS app archiving process.
Install Fastlane
If you are familiar with Mac, you might know that we can install Fastlane with Homebrew. If you don’t know Homebrew, you can check out the Homebrew website. In this article, we install Fastlane with Homebrew. You can follow the commands below to install Fastlane.
$ xcode-select --install
$ brew install fastlane

# for M1/M2 users
$ arch -x86_64 brew install fastlane
Init Fastlane
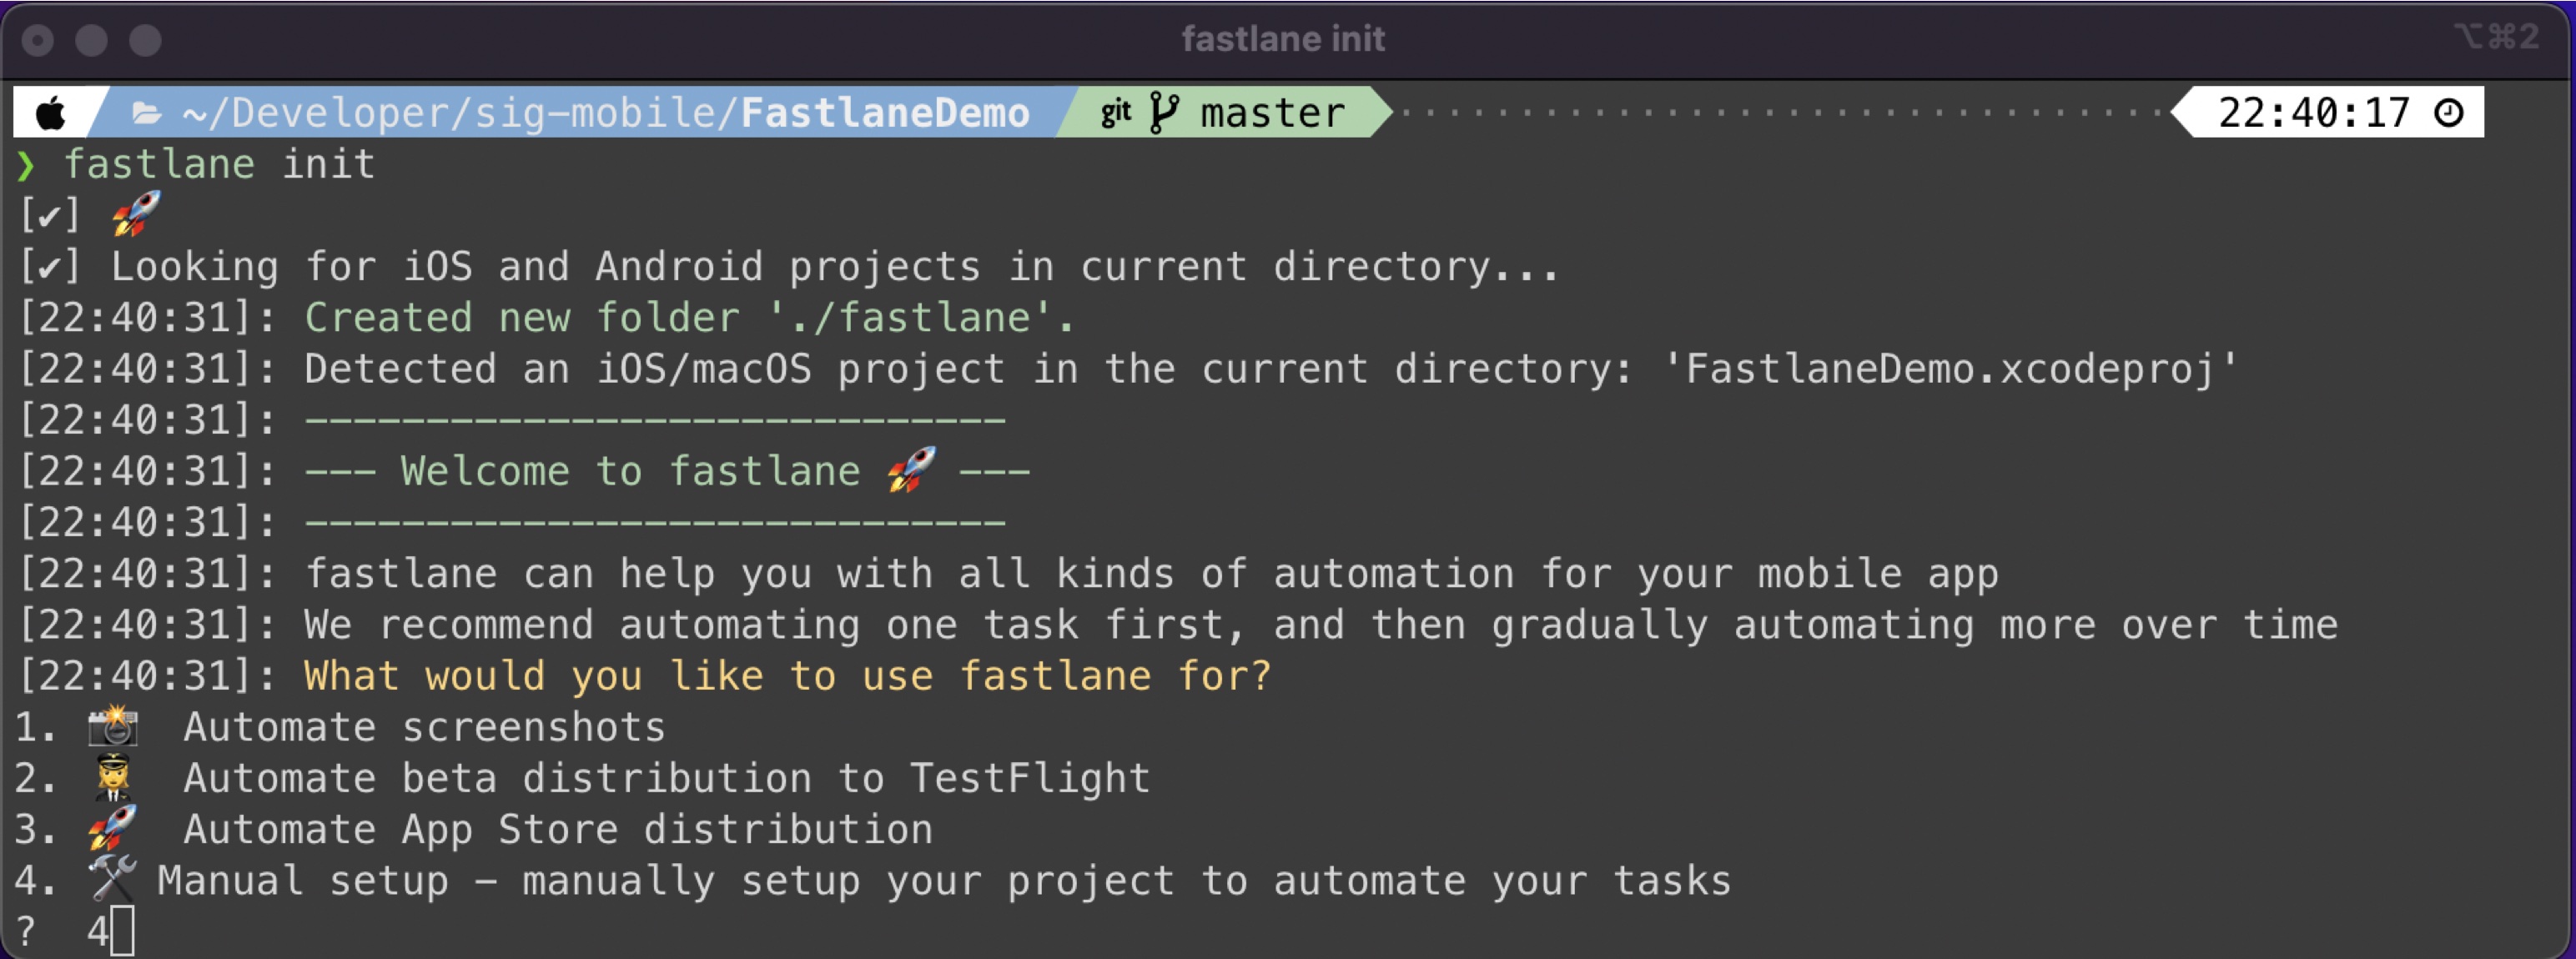
Is it easy right? As an iOS developer, we already know how to create a new project. After you create a new project, you can use the command below to initiate Fastlane.
$ fastlane init
After you run the command, you will see the following screen. You can choose the option you want. Fastlane is a friendly tool. It will help you to set up everything you need, such as bundle ID and Apple ID. In this article, we choose option 4. It is a manual setup.
Configuration
Fastlane will generate a directory named fastlane in your project. It contains some files and directories. You can see the directory structure below. The basic settings are in the Appfile and Fastfile. The Matchfile is used to manage certificates and provisioning profiles. The test_output directory contains the test reports in HTML and JUnit format. The screenshots directory contains the screenshots for App Store purposes.
Project
├── FastlaneDemo/
├── fastlane/
│   ├── Appfile (App environments)
│   ├── Fastfile (Fastlane scripts)
│   ├── Matchfile (Certificates and provisioning profiles)
│   ├── README.md (automatically generated)
│   ├── report.xml
│   ├── test_output/ (test results)
│   │   ├── report.junit
│   │   └── report.html
│   └── screenshots/
├── Gemfile
└── Gemfile.lock
Appfile
You could follow up the command below to set up the Appfile. It contains the basic information of your app. You already know the bundle identifier. You can find the team ID in the Developer Portal. It will be used on the upload to the App Store step. It is highly suggested that you should create a DevOps account as the Apple ID for CI/CD purposes instead of yours.
# The bundle identifier of your app
app_identifier("com.org.fastlane-demo")

# Developer Portal Team ID
team_id("xxxxxxxxxx")

# Your Apple email address (DevOps account)
apple_id("your@email.com")
Fastfile
This is Fastlane script file. It contains the lanes. The lanes are the steps to build, test, and release your app.
Function Test
As a senior iOS developer, we use to write unit tests for our app to assure quality. It is an easy way to run the unit test by using Fastlane. The script below will run the unit test in the FastlaneDemoTests target. The run_tests is the Fastlane command to run the unit test. You can find it in the Fastlane document.
desc "Function Tests"
lane :tests do
  run_tests(scheme: "FastlaneDemo",
            only_testing: ["FastlaneDemoTests/FastlaneDemoTests"]
  )
end
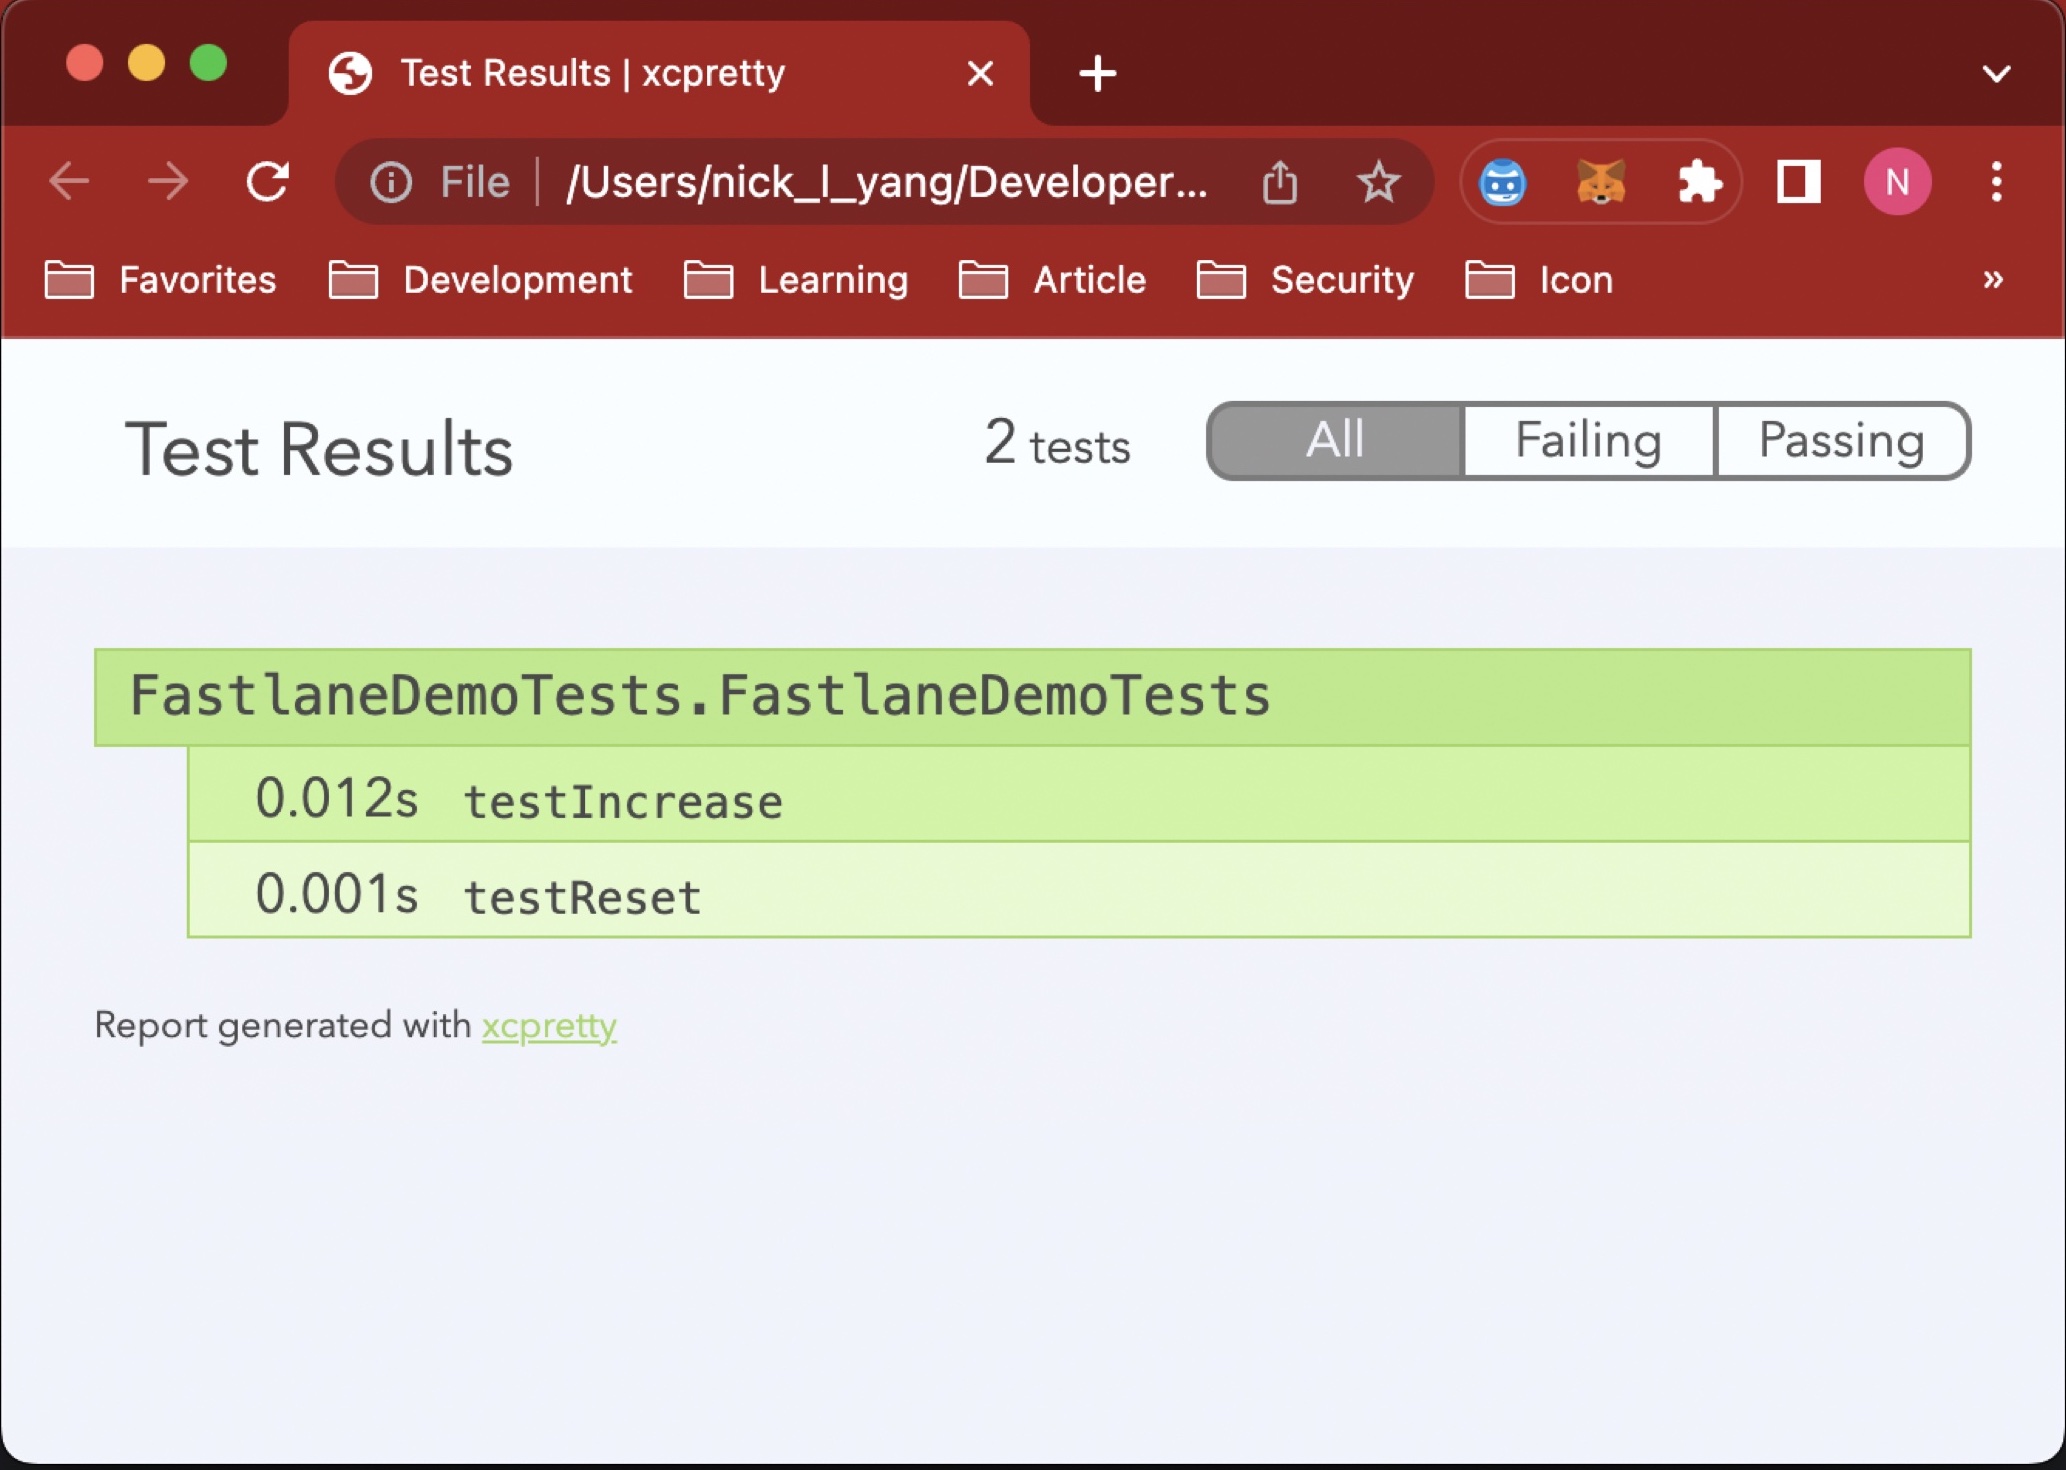
After you write the script, you can perform the command below on the terminal to run the unit test.
$ fastlane tests
The kindful tool, Fastlane, will help you to generate a test report that is like the following image. You can see it in the fastlane/test_output/report.html. It is a HTML file. You can open it in the browser. It is easy to read and understand.
Beta Release
There are several tedious tasks during uploading to TestFlight. This is the time to use Fastlane to work best for us. The script below will help you archive the app and upload it to TestFlight. You can find it in the Fastlane document.
However, there are some tips you need to know.
- For security reasons, Apple force developers to adopt 2-factor authentication during uploading codes. But we have to skip it during CI/CD processing. Hence, you should find app-specific passwords on appleid.apple.com and set it to your environment variable,
ENV["FASTLANE_APPLE_APPLICATION_SPECIFIC_PASSWORD"]. - If you integrate match to manage the certificates and provisioning profiles, you could use
get_certificatesandget_provisioning_profileto get the certificates and provisioning profiles. You can find it in the Fastlane document. It will help you to skip the manual operation to select the right certificate and provisioning profile. But in this article, I already install the certificates and provisioning profiles on my local Mac. Hence, I useunlock_keychain. - It is a best practice to avoid storing credentials in the source code or git repository. In my case, the Fastlane script will receive the credential from the environment variable I already set on the local Mac.
desc "Beta Release"
lane :beta do

# skip 2 factor authentication
ENV["FASTLANE_APPLE_APPLICATION_SPECIFIC_PASSWORD"] = ENV["APP_SPECIFIED_PASSWORD"]

#  increment_build_number
#  get_certificates
#  get_provisioning_profile

  unlock_keychain(
    path: ENV["KEYCHAIN_PATH"], # path of keychain
    password: ENV["KEYCHAIN_PASSWORD"] # Mac password
  )
  build_app(scheme: "FastlaneDemo",
            clean: true,
            silent: true,
            export_method: "app-store",
            export_xcargs: "-allowProvisioningUpdates",
            include_bitcode: true
  )
  upload_to_testflight(skip_submission: true,
                       skip_waiting_for_build_processing: true,
                       apple_id: "000000000" # on the App Store Connect
  )
end
If you set up the environment variable correctly, you can perform the command below on the terminal to upload the app to TestFlight.
$ export APP_SPECIFIED_KEY="XXXX" \
export KEYCHAIN_PATH="/Users/nick10811/Library/Keychains/login.keychain-db" \
export KEYCHAIN_PASSWORD="XXXX"
$ fastlane beta
Conclusions
This article only briefly the common commands I used. There are many other useful commands I do not cover in this article. Such as certificate management, auto-submission, auto-screen-shots, and so on. You can find more information in the Fastlane document to empower your CI/CD process. Finally, I give some suggestions to you. I very much recommend you use Fastlane if you are an independent developer or a small team. It will save you a lot of time and effort during the process of development and release. But if you are a big team, you should consider performing original commands, xcodebuild instead of using Fastlane. Fastlane is an interface of original commands. It is easy to use but it is not flexible. It does not support new arguments, such as build-for-testing and test-without-building. Hence, you should consider using original commands to perform the CI/CD process.